How to Make Scented Bath Salts
If you're anything like me, you enjoy a nice, hot, relaxing bath. I like to really pamper myself with bubble baths, bath bombs, and bath salts (especially for my aching joints). Epsom salts are pretty easy to come by but sometimes it can be hard to find them in a scent that you like. With this simple tutorial, you can learn how to scent and color your own bath salts to suit your needs! This recipe can easily be multiplied for mass production as well if you'd like to add bath salts to your product
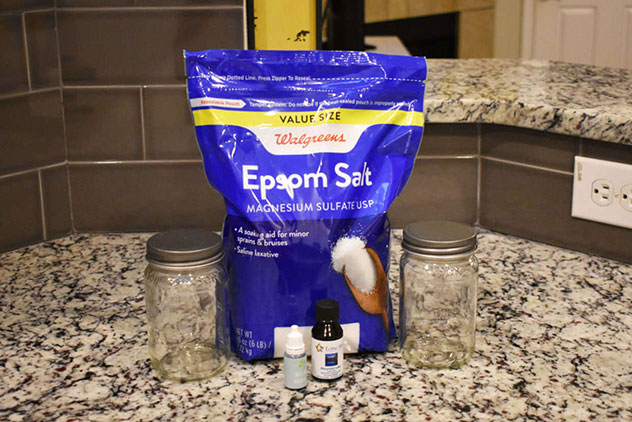
Here's What You'll Need:
Skin Safe Fragrance Oil (We used Mountain Lake)
Jars/Containers to Store the Bath Salts (Something with a Lid)
Soap Colorant
Parchment Paper
A Baking Sheet
A Spoon or Something to Stir With
A Measuring Cup
Latex Gloves (Or a Non-Latex Alternative if You're Allergic)
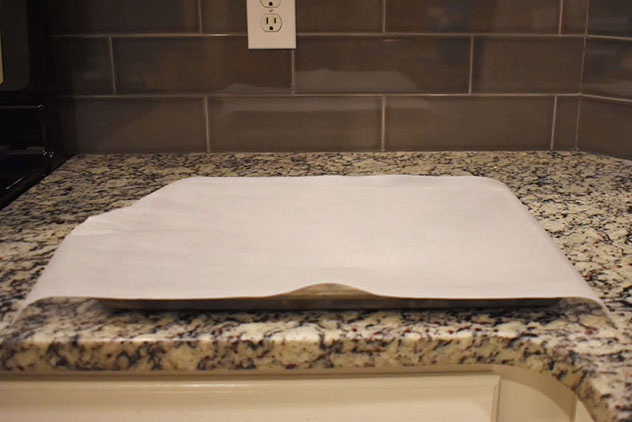
Step 1
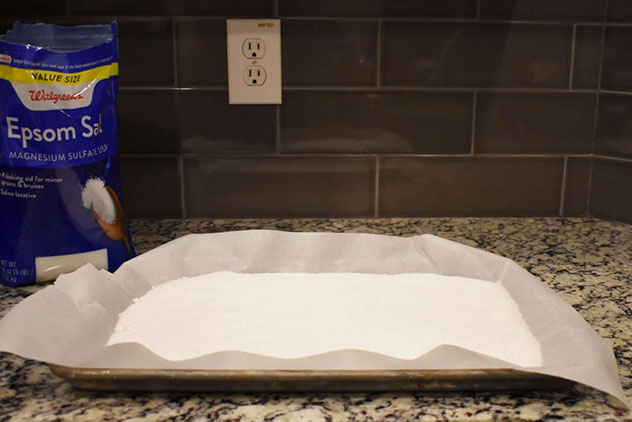
Cut a piece of parchment paper to the proper length and cover your cookie/baking sheet. This is just to protect it from the fragrance oils and colorants.
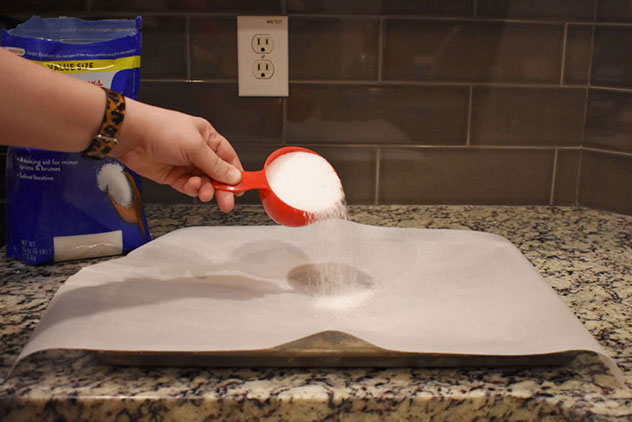
Step 2
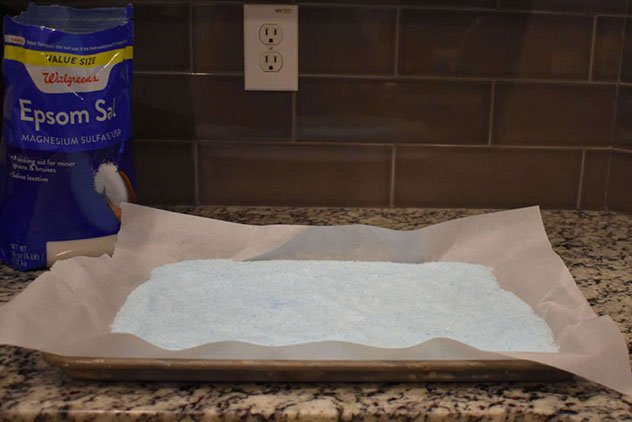
Using a measuring cup, measure out 2 cups of Epsom Salt and sprinkle them onto the parchment paper.

Step 3
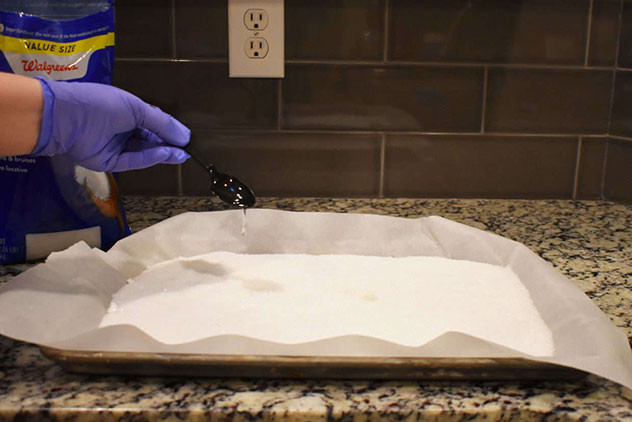
You'll probably notice that some of the salt has clumped together. The easiest way to break these clumps up is to simply break them up by hand. Make sure you are wearing gloves from this point on for sanitary purposes and to protect your skin from the fragrance and soap colorant!
Step 4
Using your hands, spread out the salts evenly across the parchment paper. This will make it easier when adding your fragrance and color.
Step 5
Add 1 teaspoon of fragrance oil. You'll want to sprinkle the fragrance around on the salts as much as you can just to disperse it better. If you happen to have an eye dropper or a pipette handy, you can use one of those as well!
Step 6
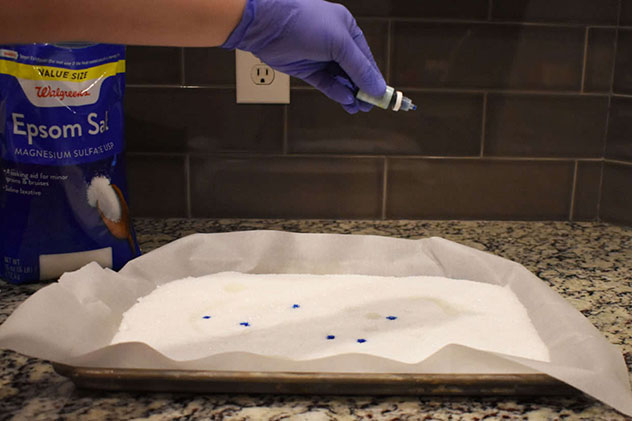
Take your soap colorant and place a few drops in the salts. This amount will vary depending on how dark you would like your color to be.
Step 7
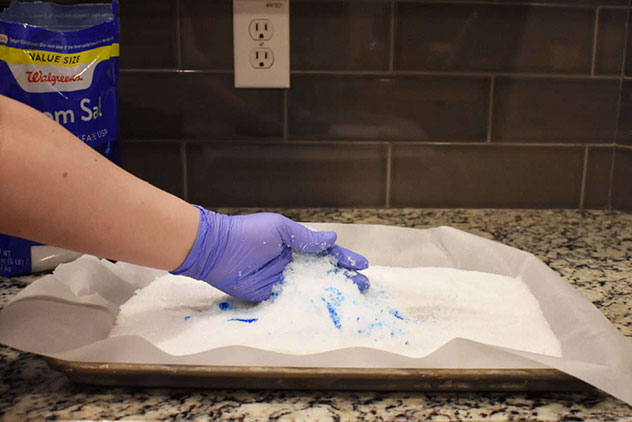
Using your hands, gently mix everything together. The fragrance and colorant are going to clump up in the salts so pick up small hand-fulls and gently rub the salts together to really mix it together well. Your color should be evenly distributed once everything is properly blended.
Note: For mass production, you can do all these previous steps in a bowl using a standing or hand mixer. If you do this, please make sure you are in a well-ventilated area and wear a mask to protect yourself from dust particles from the salt.
Step 8
Spread the salts back out across the parchment paper, evenly. You'll want to make sure they are spread out thin, so they can properly dry.
It shouldn't take long for the salts to dry but, it is best to leave them like this for several hours. It may take longer for them to dry if you are in a more humid climate but leaving them overnight is ideal. If the salts are still wet when you try to pour them into a jar, the oils and color can all sink down to the bottom of the jar.

Step 9
All that's left now is to pour the salts into the jar of your choice! You'll want to make sure that the jar has an air-tight lid so you can keep moisture out of the salts to keep them from dissolving.
We have a wonderful selection of jars with metal twist lids that have plastisol liners in them that would be perfect for this project.
Now it's time for you to try! Make this project your own with your favorite skin safe scent and colors!
We'd love to see pictures of your creations! If you post your results on social media, make sure you tag us and use #lonestarcommunity to see your pictures on our Lone Star Community Page!