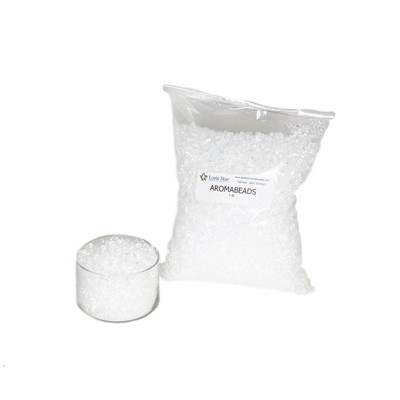
How to Make Aroma Beads
Start by gathering all the items that you will need. The process will go much more smoothly if everything is readily accessible.

Here's What You'll Need:
Cookie Sheet or Pan
Parchment Paper or Silicone Sheet (not wax paper!)
Large Nail with Flat Head (optional)
Large Container with lid (HDPE plastic containers work the best but glass works, too)
Step 1
Start by measuring out 16 oz of aroma beads using your digital scale.
Step 2
Measure out your fragrance oil. These beads CAN hold up to 2 oz of fragrance oil per pound but it may not be necessary to add that much. We recommend starting out with 1 oz of fragrance oil and adding more as needed.
Step 3
Add the desired amount of liquid candle dye to your fragrance oil and stir them together. Remember that a little goes a long way with the dyes, especially in aroma beads so start out with 2 or 3 drops at first.
Step 4
Pour the fragrance oil/candle dye mixture into the container with the aroma beads and secure the lid to your container. MAKE SURE THE LID IS ON TIGHT!!!
Give the aroma beads a good shake while keeping your hand over the lid of the container. You'll need to shake the beads for a couple of minutes to get the color and fragrance oil to fully disperse. The beads will look very wet but keep in mind it can take a few days for the oil to be fully absorbed.
Step 5
Once your beads have fully absorbed the fragrance oil you can pour the loose beads into a sachet bag or, use metal cookie cutters to melt them into fun shapes! With a little bit of creativity and imagination, the possibilities are endless!
Baking Aroma Beads
Step 6
Preheat your oven to 325°F-350°F
Step 7
Cut a piece of parchment paper to fit your cookie sheet. Lay out cookie cutters on the cookie sheets. Try to use cookie cutters that are the same size so they will melt evenly. Place the nail where you want the hole to be. (This is optional but is perfect if you want to thread some rope or string through your air fresheners to hang them up).
Step 8
Place the nail where you want the hole to be. (This is optional but is perfect if you want to thread some rope or string through your air fresheners to hang them up). Pour the aroma beads around the nail and fill the cookie cutters about 3/4 full. Make sure you pack them in by tapping them with your fingers or the back of a spoon.
Step 9
Bake the aroma beads for 6-10 minutes. The time needed to bake your beads will depend on the size and thickness of your cookie cutters. Every oven is different so make sure you TEST!!!
Step 10
Take the cookie sheet out of the oven and allow the aroma beads to cool for a few minutes then loosen the aroma beads from the cookie sheet by gently moving them around.
After about 10 minutes, while the aroma beads are still warm, pop them out of the cookie cutters, remove the nail if you've used one, and place them to the side to cool.
Step 11
Allow them to completely cool and then you're ready to package them or hang them somewhere to add your favorite scent to your car, office, room, etc.
Important Note: Be sure to allow the aroma beads about 8-10 days to cure before baking them. Baking them too early can make the scent throw very weak.
That's it!
You're finished!
For more detailed instructions and pictures on melting Aroma Beads, check out our step-by-step guide, Melting Aroma Beads Into Shapes.
Tag us if you share your creations on your social media accounts! You can use the hashtag #lonestarcommunity and see your beautiful creations on our Lone Star Community page.